Installing MinerOs is a quick and easy process for all categories of users
First of all, you will need any USB flash drive or SSD/HDD of at least 8 GB (USB 3.0 recommended) and mining rig with 2 GB+ RAM (4 GB+ recommended) and Intel® Core ™ 2 processor or better / AMD am2 + or better. Installing our operating system for mining will not take much time.
There are 3 installation methods:
- Express method - just click on the "Download" button in your account
- Classical method - you will have to manually edit the config file in the image
- Migrating rigs from another OS - you have many rigs on another OS for mining on the local network and you need to quickly transfer everything to MinerOs
Let's consider each method in more detail:
- Express method is quick and super simple. If you are a beginner and you do not have many rigs on another OS, then this method is recommended for use!
- You need to register and enter the MinerOs user panel.
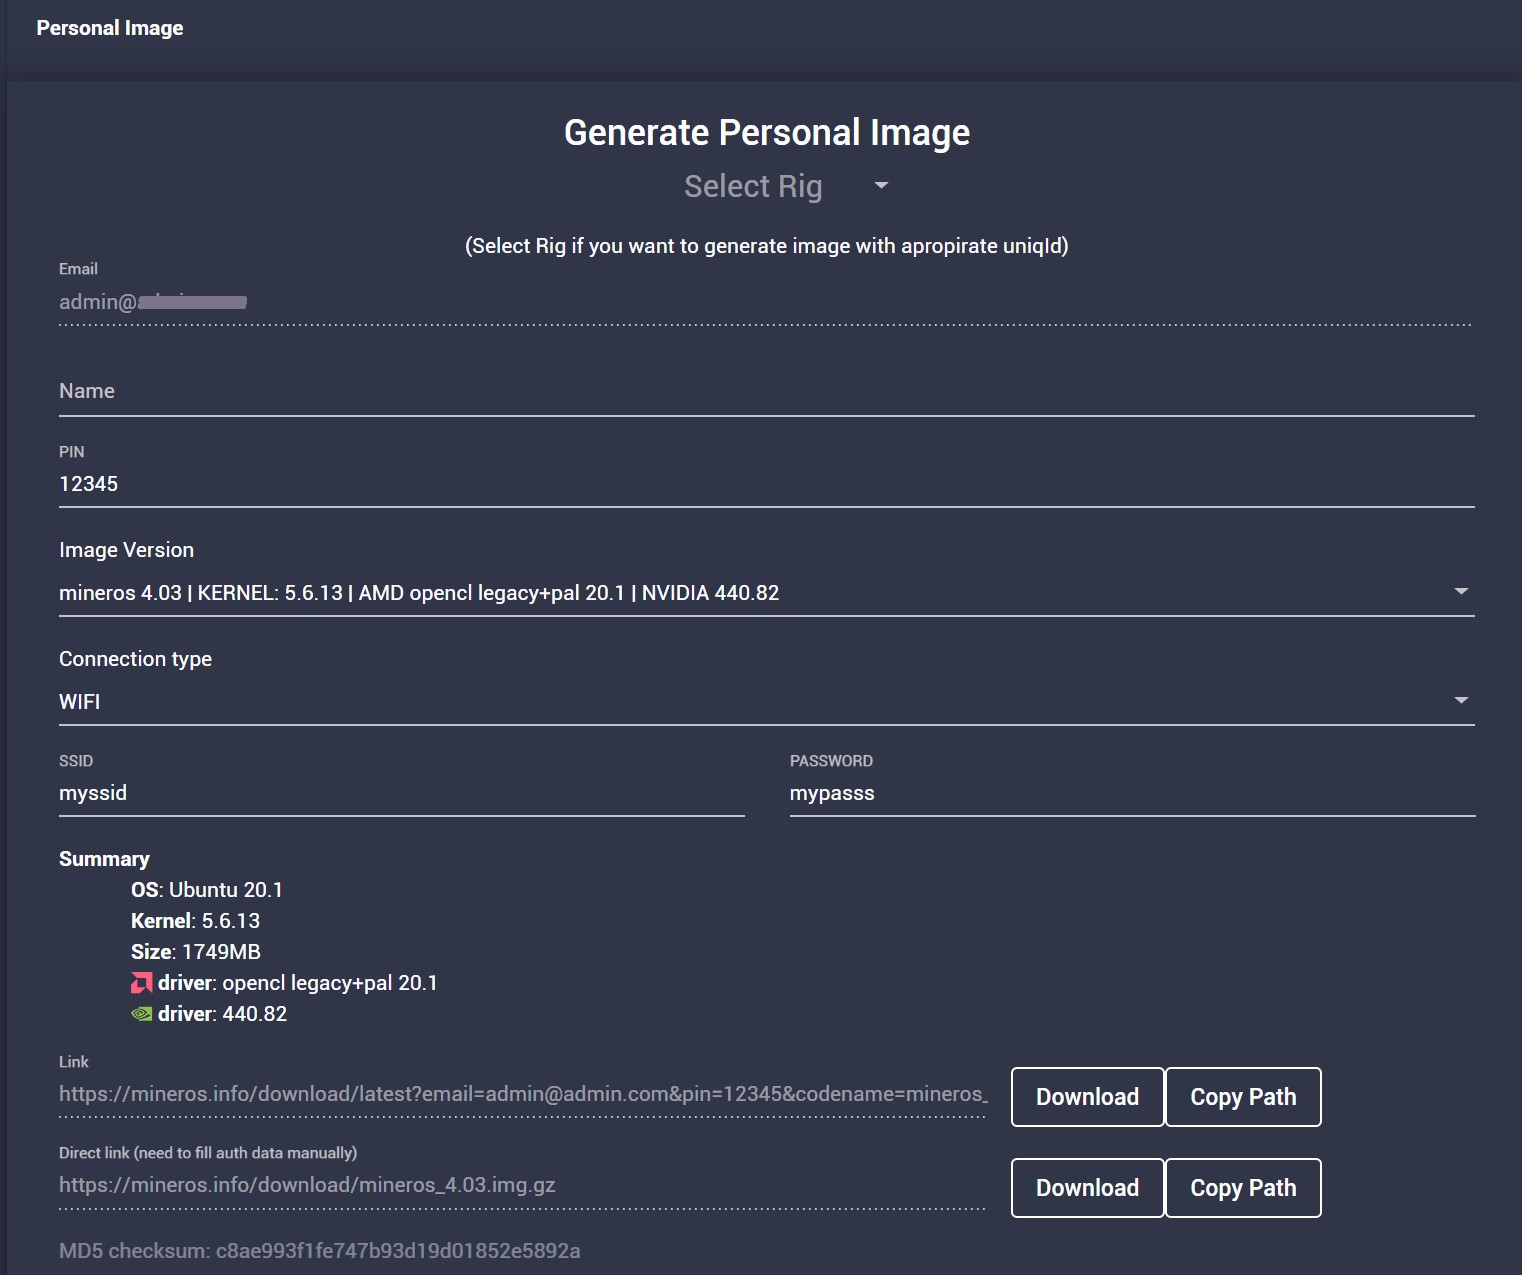
- Go to the Download Image page from the top menu and click on the top "Download". After that, the download of the personalized MinerOs image as archive will begin. Authentication data will be automatically embedded in it, and the image will be compressed on the fly. Also, when generating an image, it is possible to specify the type of network used and configure it. In the latest image, 3 types of connections are supported: dhcp, wifi and static. In most cases, if you have wired internet, you need to use the default mode - dhcp. An example for setting up Wi-Fi network is shown below.
- Wait until ~850-1700Mb (depending on the version of the image) is downloaded and unzip it using the gunzip command (in Linux) or rar (in windows).
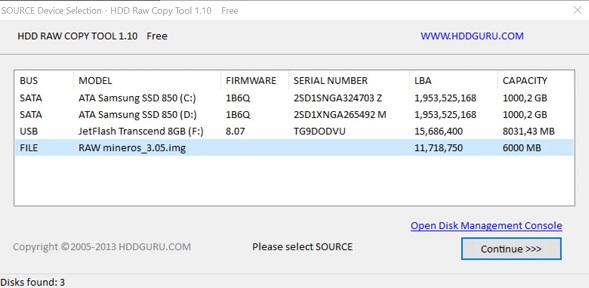
- Burn the image to a USB flash drive using dd if=mineros-x.xx.img of=/dev/sdb bs=10M status=progress (Linux tool) or HddRawCopy (Windows tool).
- Classic method is for advanced users. It will require manual configuration file changes.
- Download the public image, unzip it and burn it to a USB flash drive or any other SSD / HDD using the gunzip command (in Linux) or rar (in windows).
- Burn the image to your storage device (minimum 8 GB) using HDDRawCopy (for Windows users). Linux and Mac users can use the dd command to write a RAW image to disk. Something like dd if=mineros-x.xx.img of=/dev/sdb bs=10M status=progress.
- Go to MINEROS_DISK:\auth.txt and set your email address as an authentication token (email field).
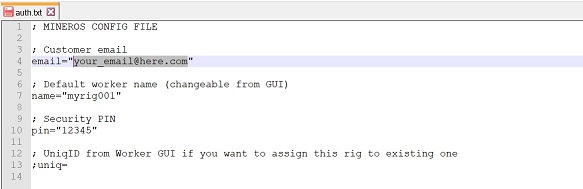
Other fields in auth.txt:
- name- the default name of the rig (you can change it in the user panel later).
- pinis a security token. You can set your own pin code, but do not forget to set the same number on the user panel! The default is 12345.
- uniq- this field should be empty for new rigs. If you already have an added and configured rig in the user panel and you want to assign the current OS to it, then place the token from the settings tab of this rig in the UniqId field in the user control panel.
Network settings network.txt:
The network.txt file is the settings for your network. DHCP is enabled by default. If you are using a wifi network or static IP, edit the above file. See Wi-Fi setup example below.
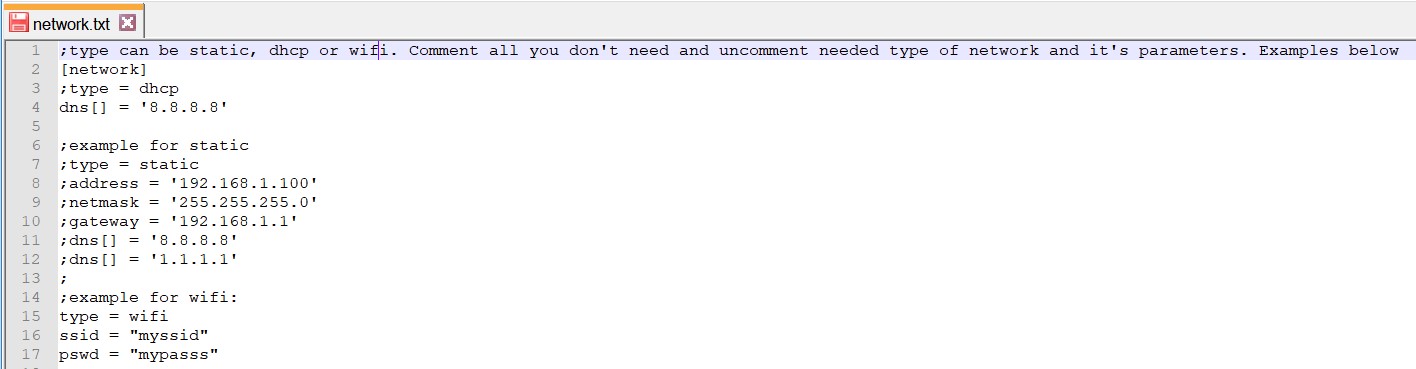
By default, the network is configured to use dhcp. You can also set the mode to static and wifi (see the example in the image above). The sign ";" before the configuration line, means that this line is ignored. For example, if you use a Wi-Fi adapter, write the following information:
type = wifi
ssid = "your_wifi_network_name"
pswd = "your_wifi_network_password"
- Migrating rigs from another OS - if you want to quickly and almost without stopping mining replace any ubuntu/debian OS (such as HiveOS, MinerStat, EthOS, etc.) on your mining rigs located on the same local network, then this can be done as quickly as possible using our official MinerOs Migration Utility. How to do this in the form of step-by-step instructions can be read here. If there is a need to mass-install the MinerOs image on remote servers on which you have SSH access with external IP addresses (that are not on your local network), then you can use the remote mode of the MinerOs Migration Utility. You can read more about this in this article.
After recording the image using any of the above methods, go to your MinerOs personal account
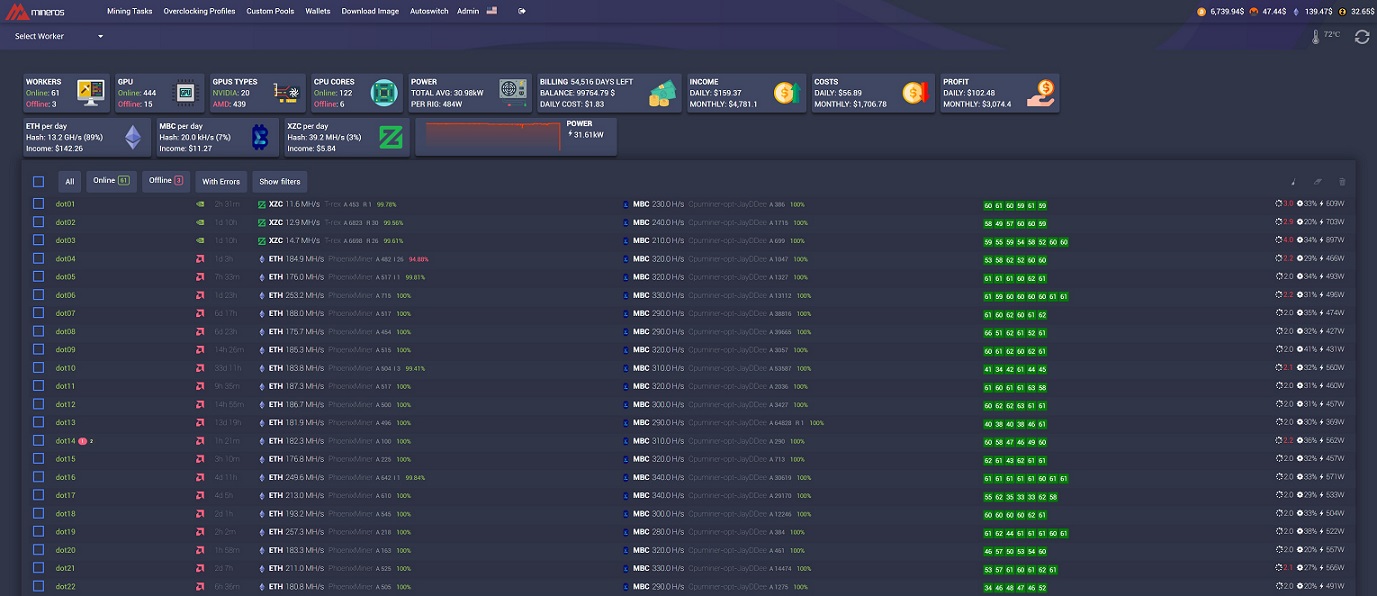
Launch your rig and you will see that it is online in the user panel. Then you will need to create a mining task and configure overclocking, if necessary. Have a good mining!
If you cannot start the rig, check the BIOS settings:
- Turn on 4G encoding
- Update the BIOS to the latest version, if possible
- Turn on legacy boot mode
- Turn off virtualization
Video about MinerOS Mining operation system installation from Chatlanin (RU):
After you have successfully burned the MinerOs image to your media, proceed to the article on setting up the first rig.